N.B. This feature is only available on the SCADA server or in standalone Profile.
To request monitored fields they must be set up for a configuration and then added to an RTU.
Changes to monitored fields can be recorded as a logbook entry in Profile, raised as an issue in Profile, and sent to specified users by email. The actions can be configured on a field-by-field basis.
1. Click the cog icon in the Location Bar and select ‘Configurations’ on the menu

The Configurations List is displayed:

2. Select the configuration type 1
3. Select a configuration 2
The configuration editor is displayed:
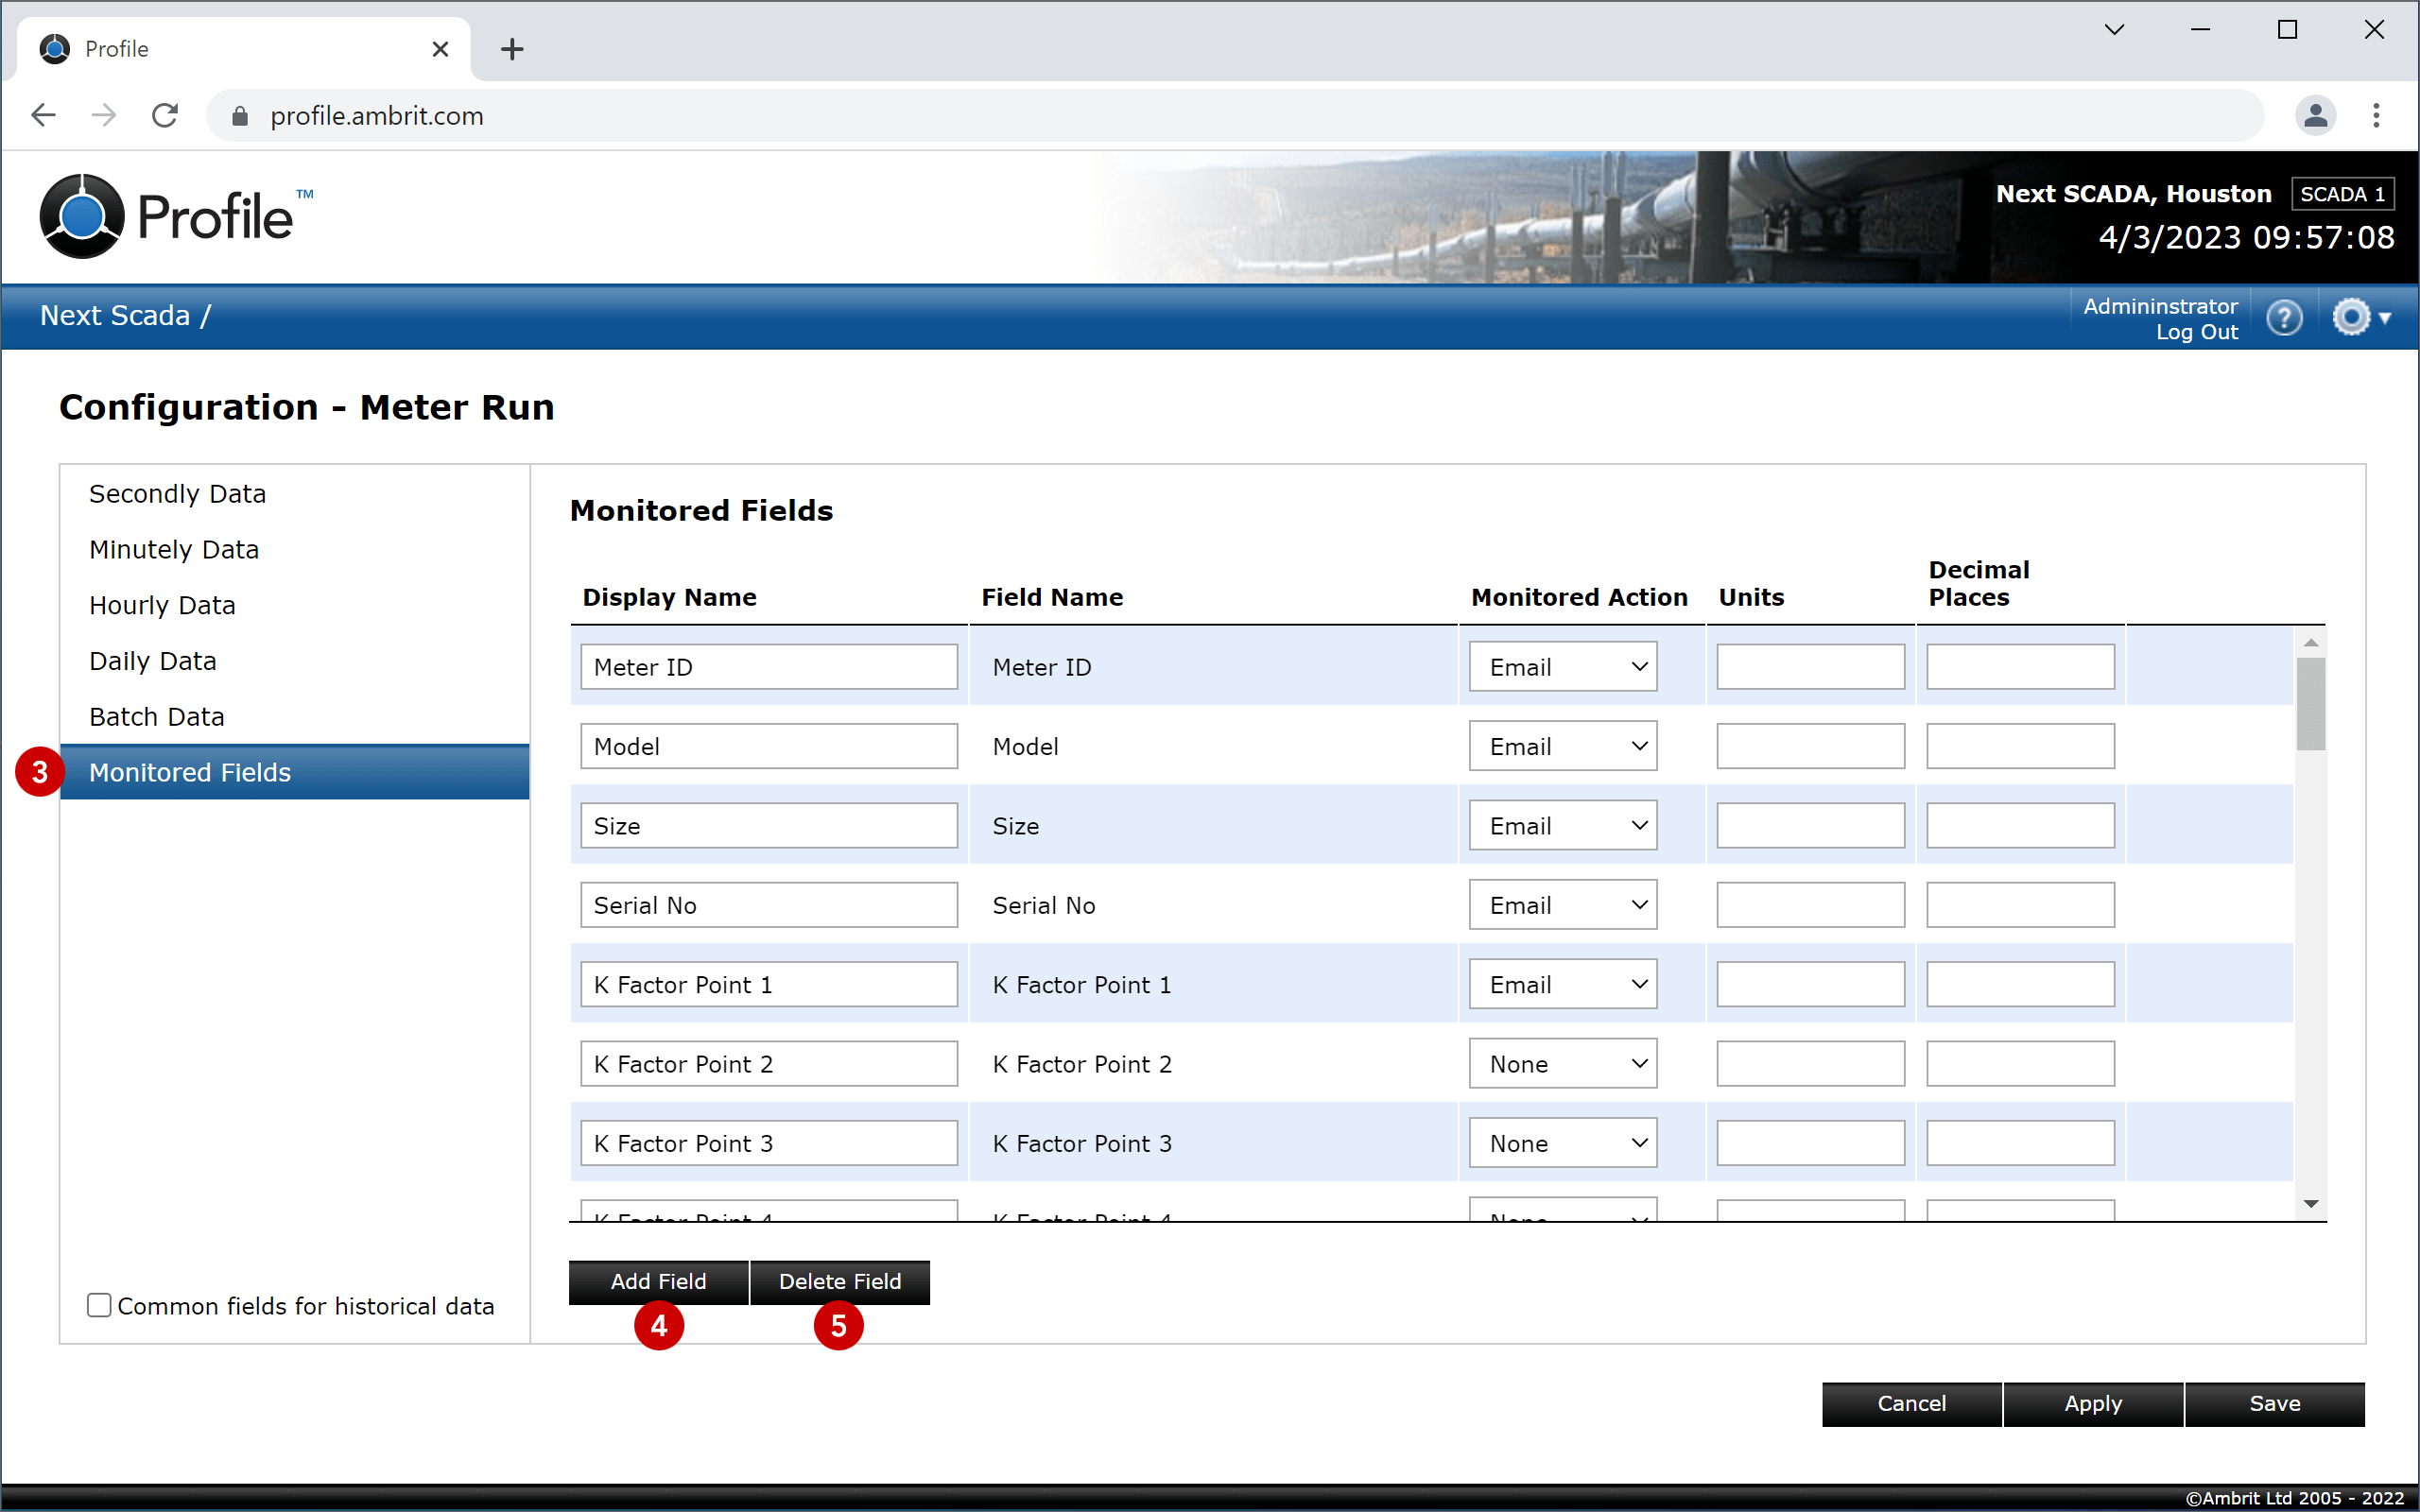
4. Select the ‘Monitored Fields’ section in the sidebar 3
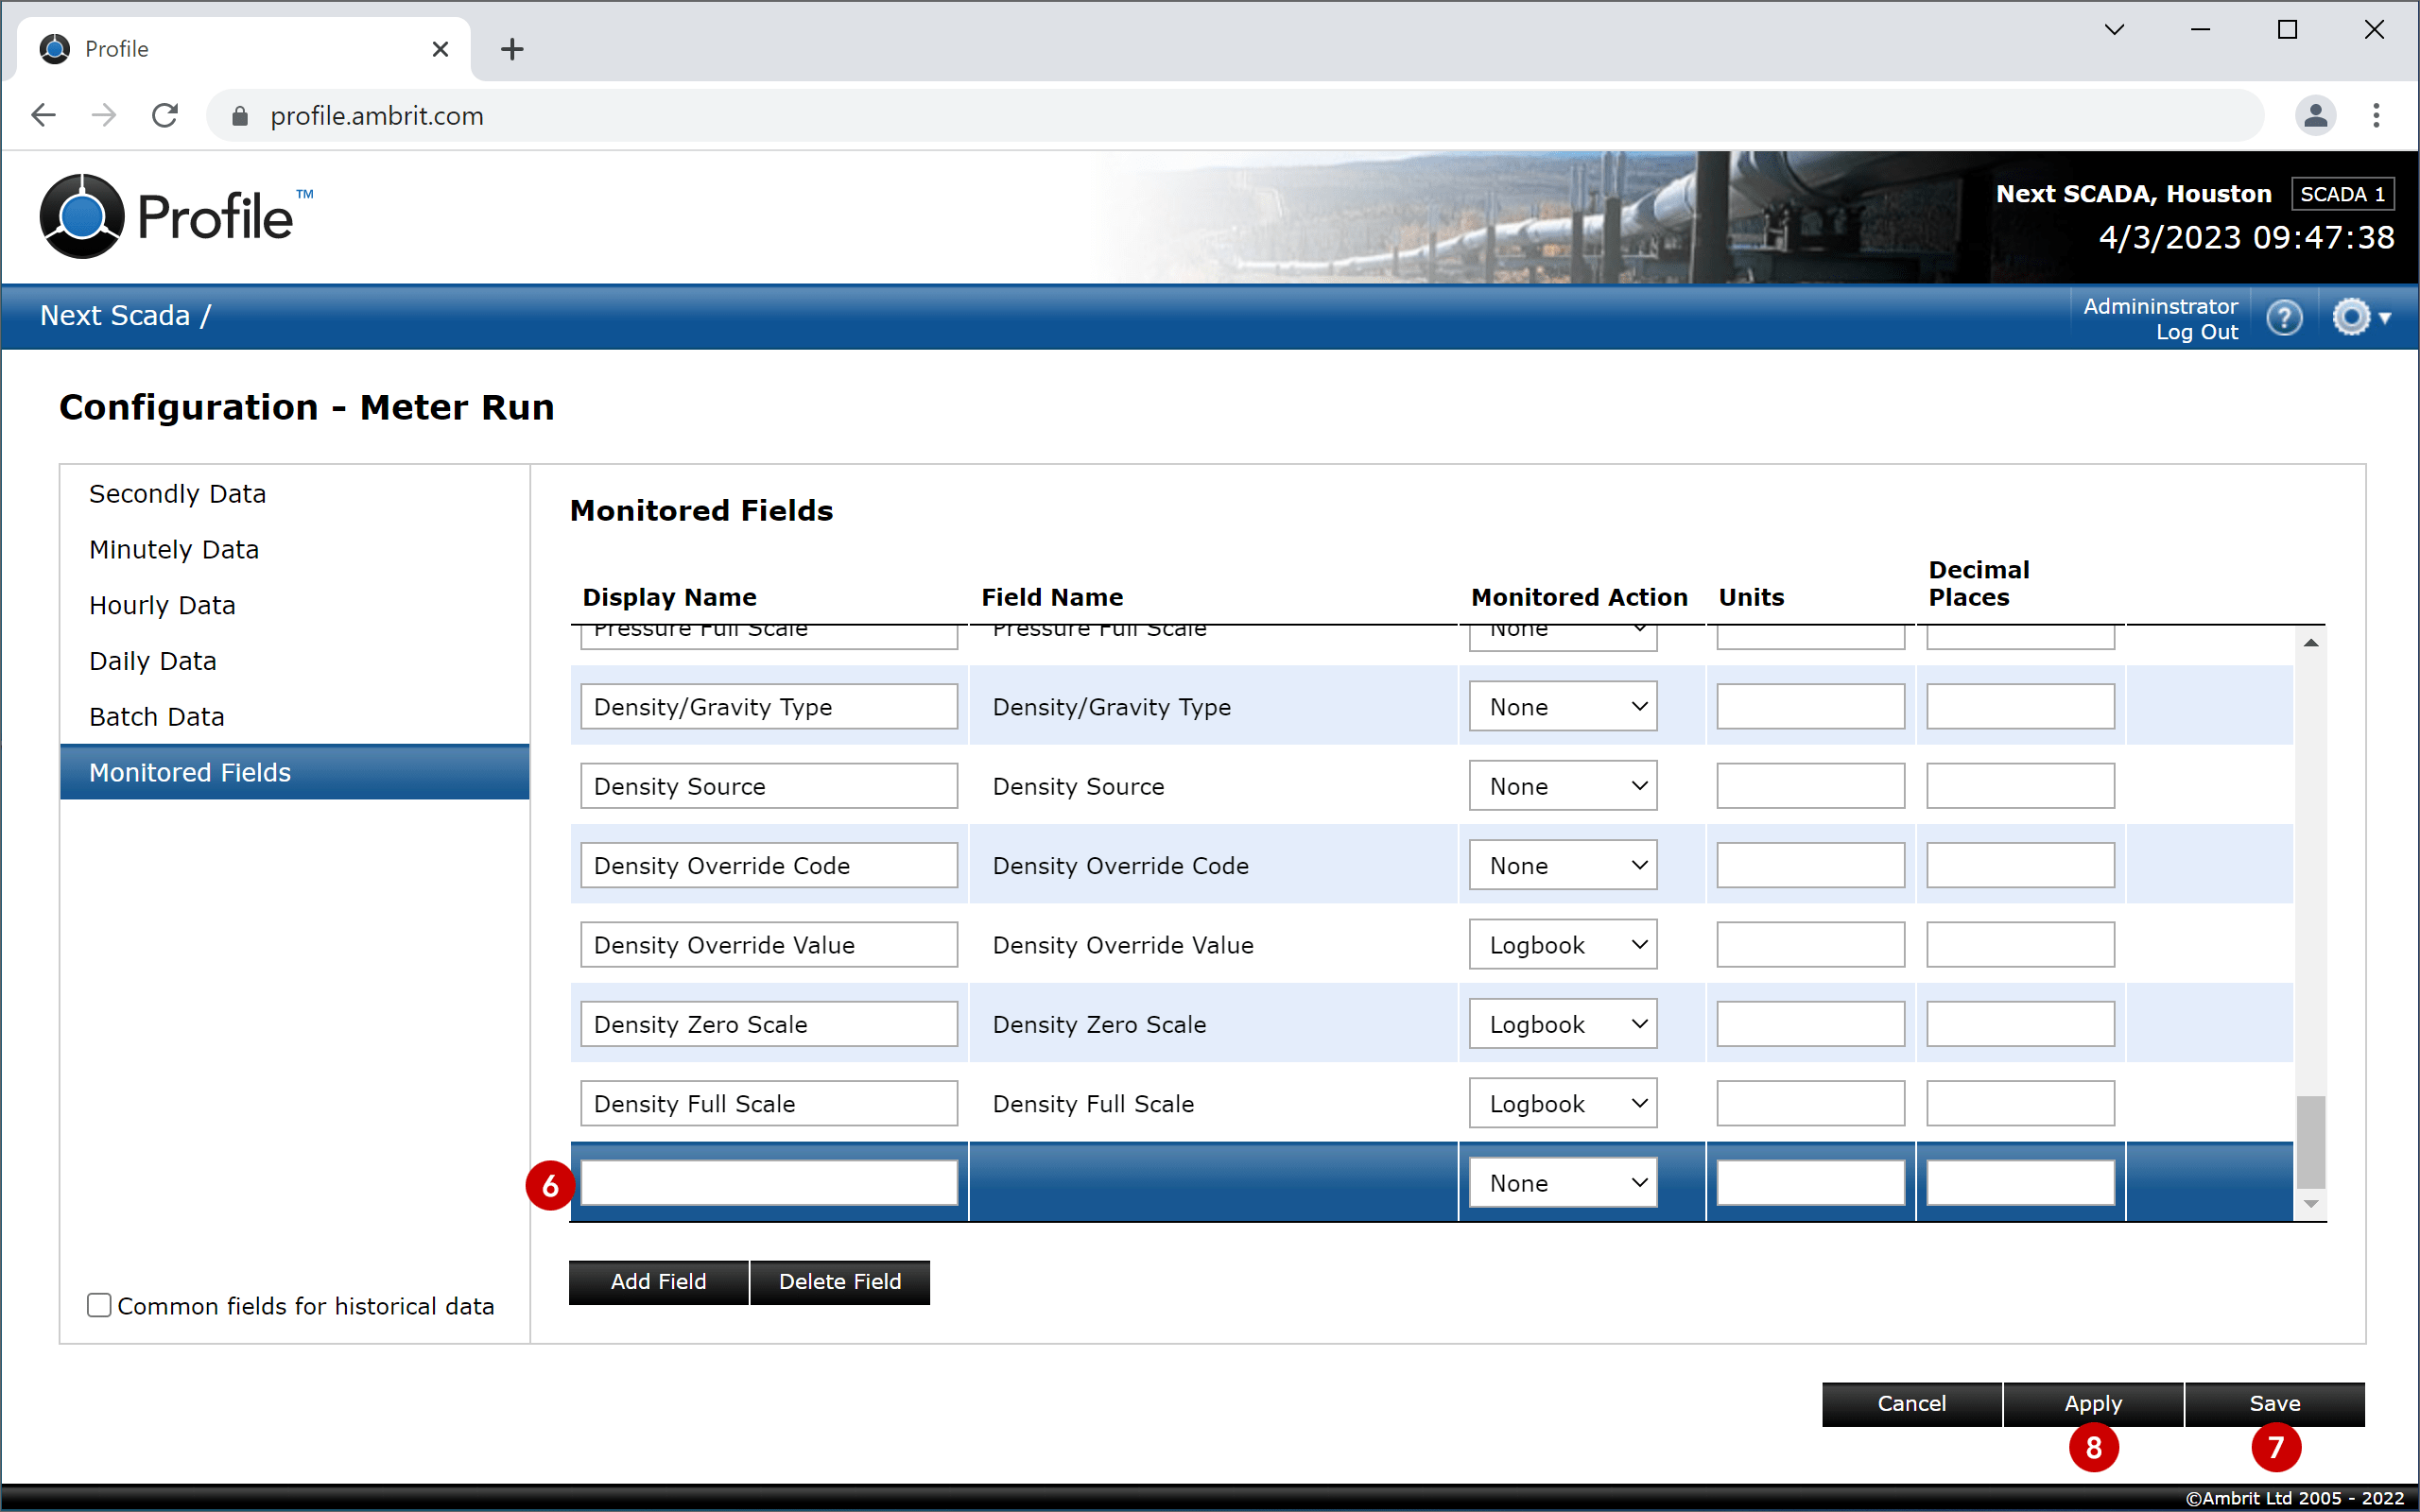
5. Click the ‘Add Field’ button 4
If there is not a row selected, the new field will be added at the top of the list. If a row is selected, the new row will be added immediately above the selected row.
To delete a field, select its row in the list and click the ‘Delete Field’ button 5. N.B. Configurations may have default fields which cannot be deleted. Default fields also have a Field Name which cannot be edited.
To reorder fields, drag and drop them to a new position in the list.
6. Enter the new field settings 6
| Display Name | The name for the field which will be used throughout the Profile user interface. |
| Monitored Action | The action(s) that should be performed when the monitored field changes:
None = No action. Logbook = Generate a logbook entry in Profile. Issue = Generate an issue in Profile. N.B. Also generates a logbook entry in Profile. Email = Include the issue in the Daily Measurement Issues email. N.B. Also generates a logbook entry and raises an issue in Profile. |
| Units | The units that should be displayed for the field. |
| Decimal Places | The number of decimal places that should be displayed for the field. |
7. Click the ‘Save’ button to save the changes and return to the Configurations list 7
N.B. Click the ‘Apply’ button to save the changes without returning to the Configurations list 8.